Starlink Installation in Patterson, CA by ProSat Networks. Call 1-844-799-0258 for Starlink installers & IT network services for your business.
On
This article features the Starlink installation in Patterson, CA by ProSat Networks 1-844-799-0258. We are a professional Starlink installers for commercial businesses, residential homes, RV parks, campgrounds, construction sites, dairy & agriculture farms, airplane hangars, mines & mining operations, long-range and multi-building indoor-outdoor wireless solutions in Patterson, CA.
For inquiries and request for a quote, call 1-844-799-0258.
Project Overview: Starlink Business Installation in Patterson, CA
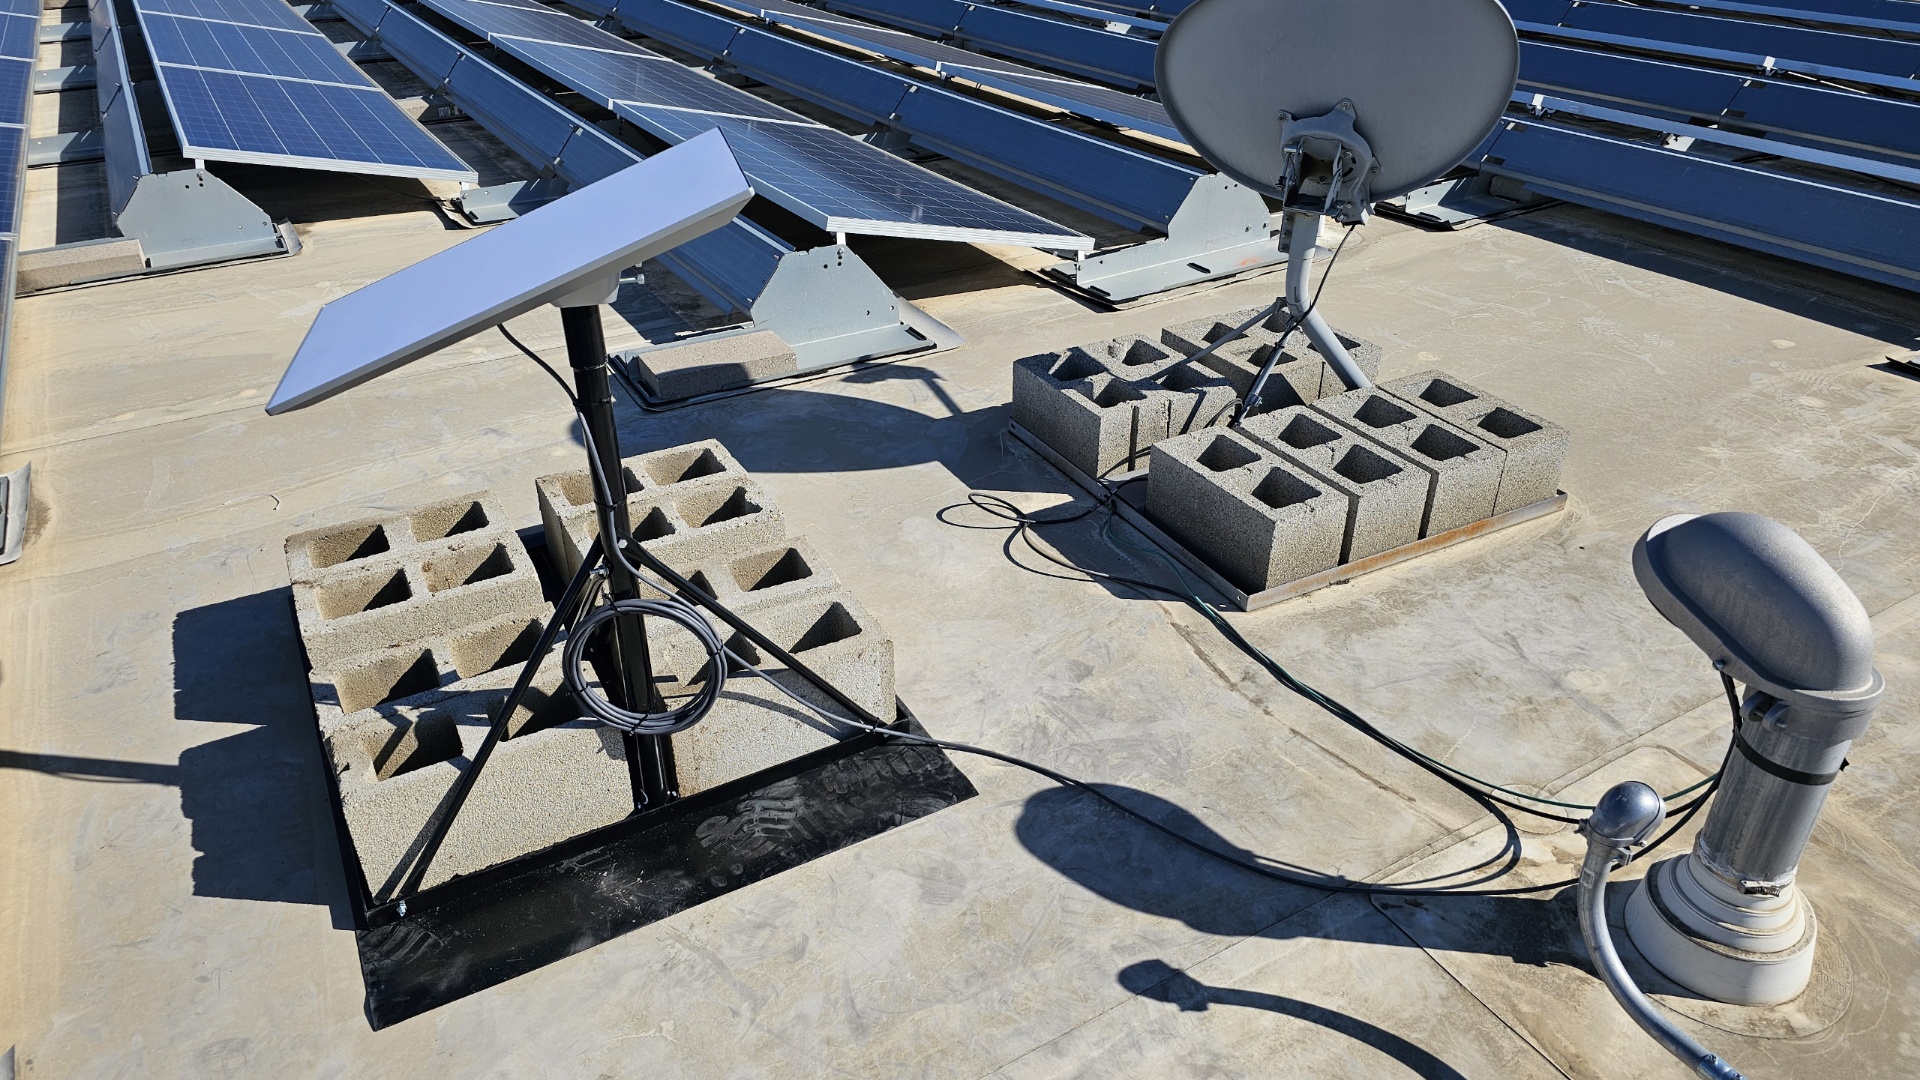
Mount: Non-penetrating roof mount with weighted blocks
Starlink Use: Failover internet connection
Our Starlink installation SMEs received a service request for the installation of Starlink Enterprise Kit and removal of the current satellite dish. As part of Starlink business installation process, we performed the following:
1. Starlink Installation Site Assessment and Preparation
To ensure a successful Starlink deployment and proper removal of existing satellite, a site survey visit was done to:
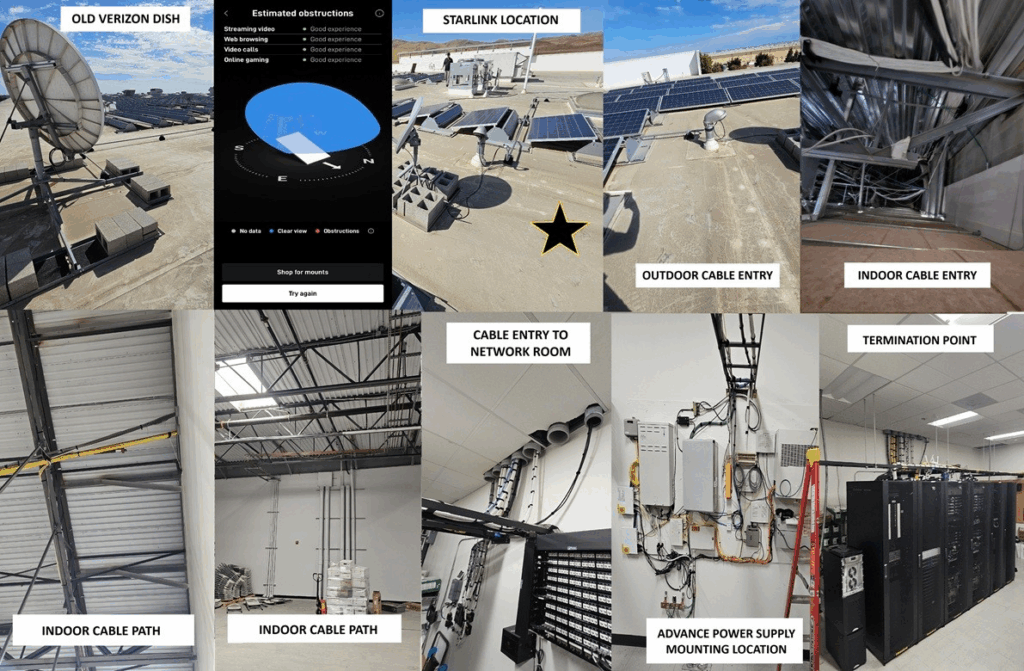
Identify the optimal installation point for the Starlink dish by conducting an obstruction test through the Starlink app, ensuring clear sky visibility and obtaining the customer’s approval before final placement.
Evaluate the most efficient cable path, entry point and termination with customer’s approval.
Determine power supply mounting location
Verify needed installation materials, tools and equipment.
Develop installation floor plan if necessary.
Document installation recommendation and site conditions with photos
Inspect the existing dish and provide a condition assessment.
Confirm the type of mount installed.
Outline the removal process, including safe disconnection of cabling, dismantling of the dish/mount, and adherence to commercial site safety protocols.
Identify any repair or restoration work that may be required post-removal (e.g., resealing penetrations, patching roof membrane, restoring protective coatings).
After the assessment, our Starlink SMEs sent the installation proposal for customer’s approval. Once approved and the equipment was confirmed onsite, our team coordinated the installation schedule with our Starlink installers in Patterson, CA.
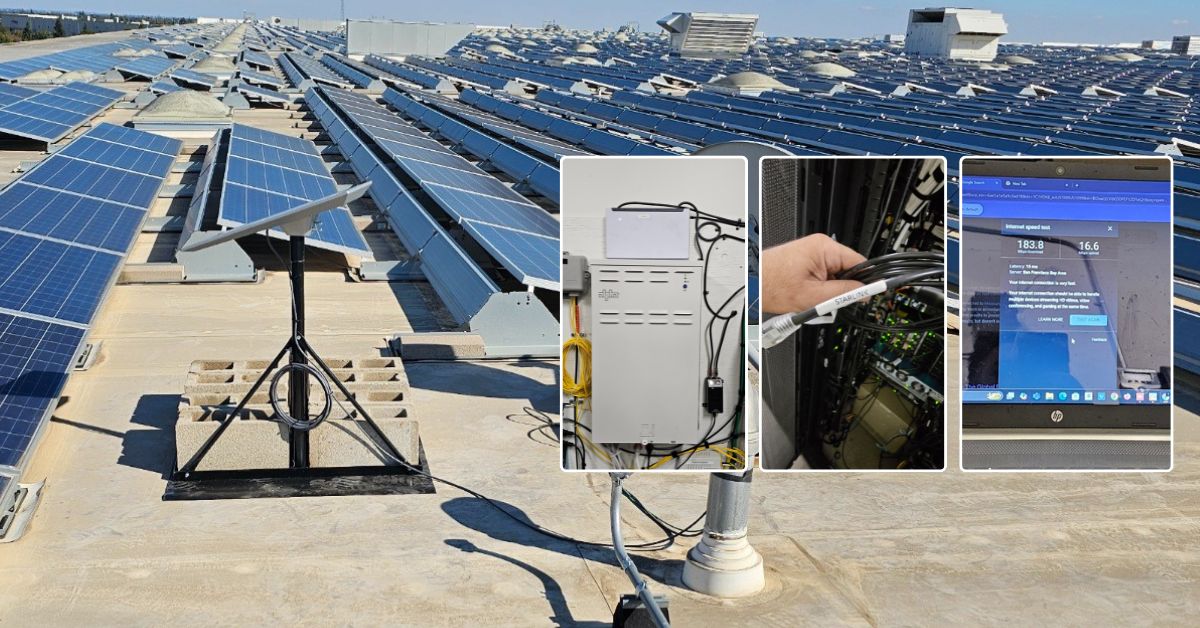
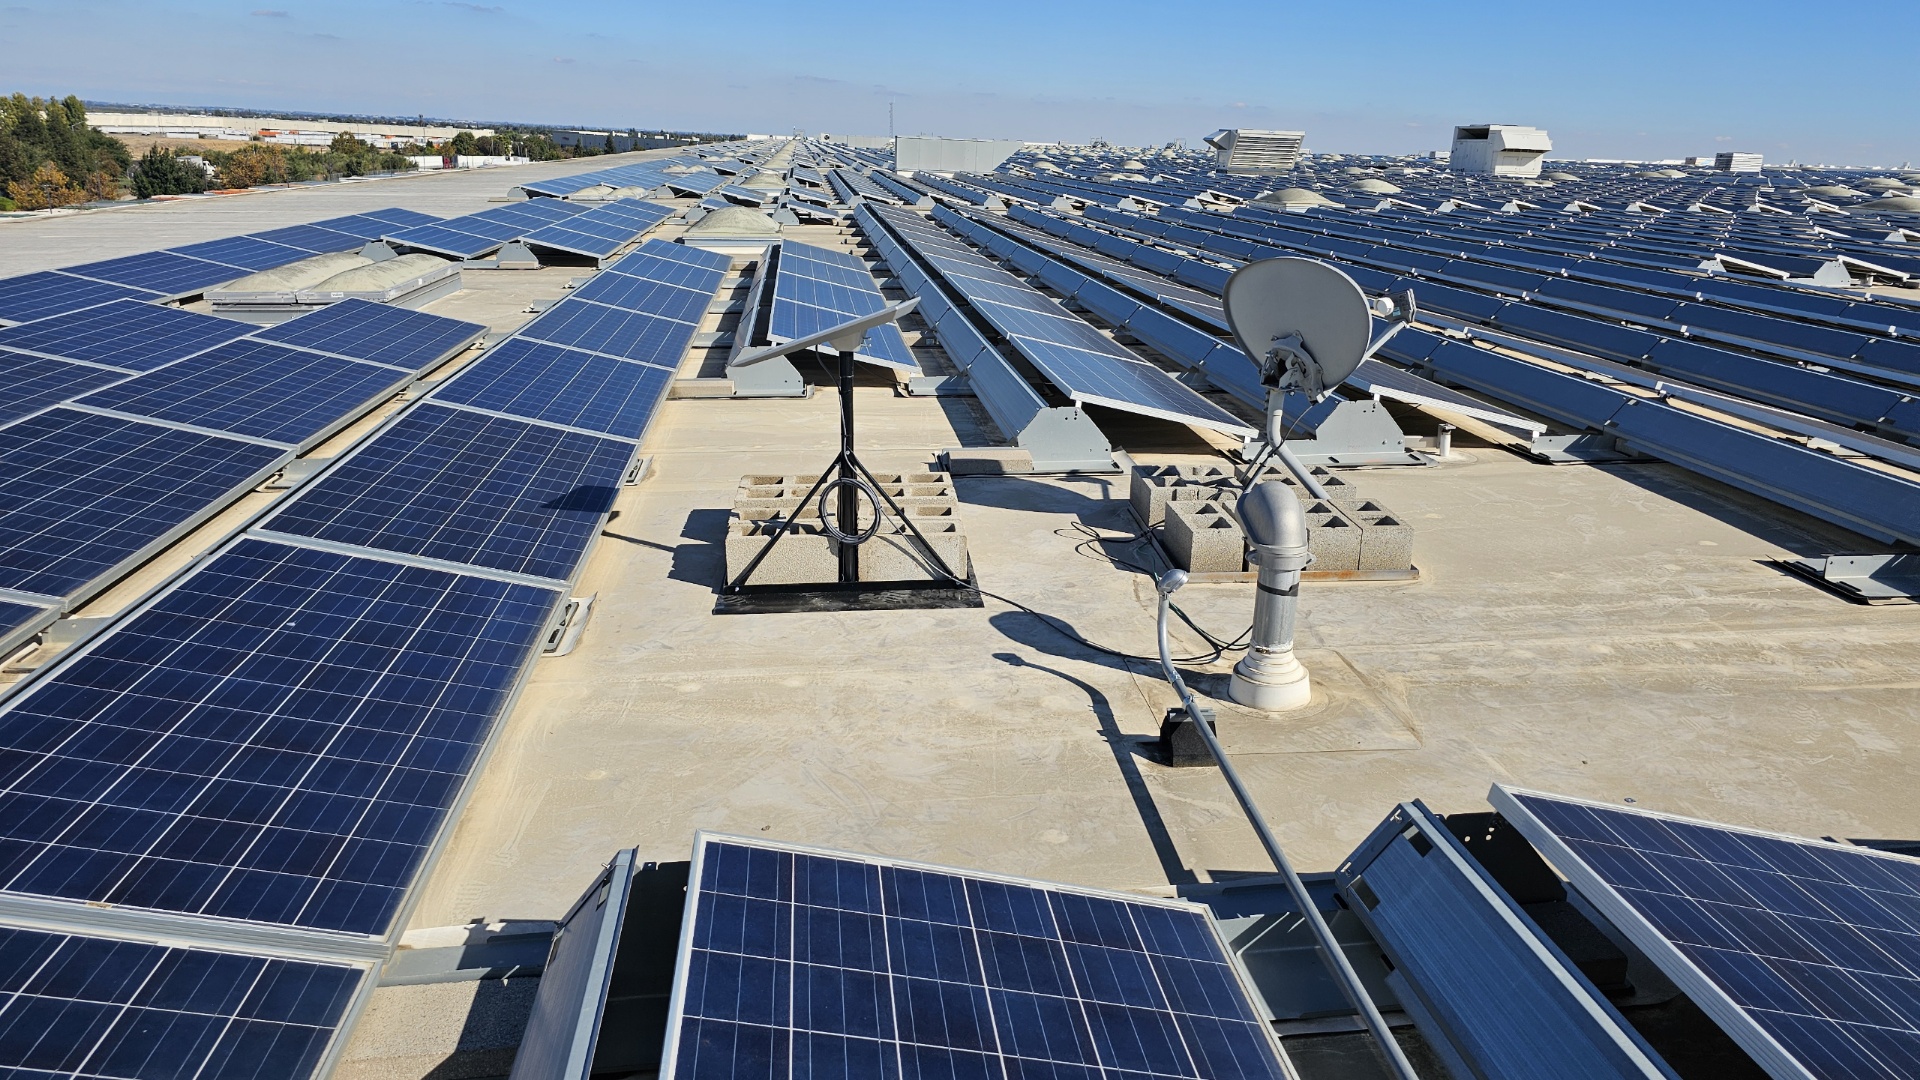
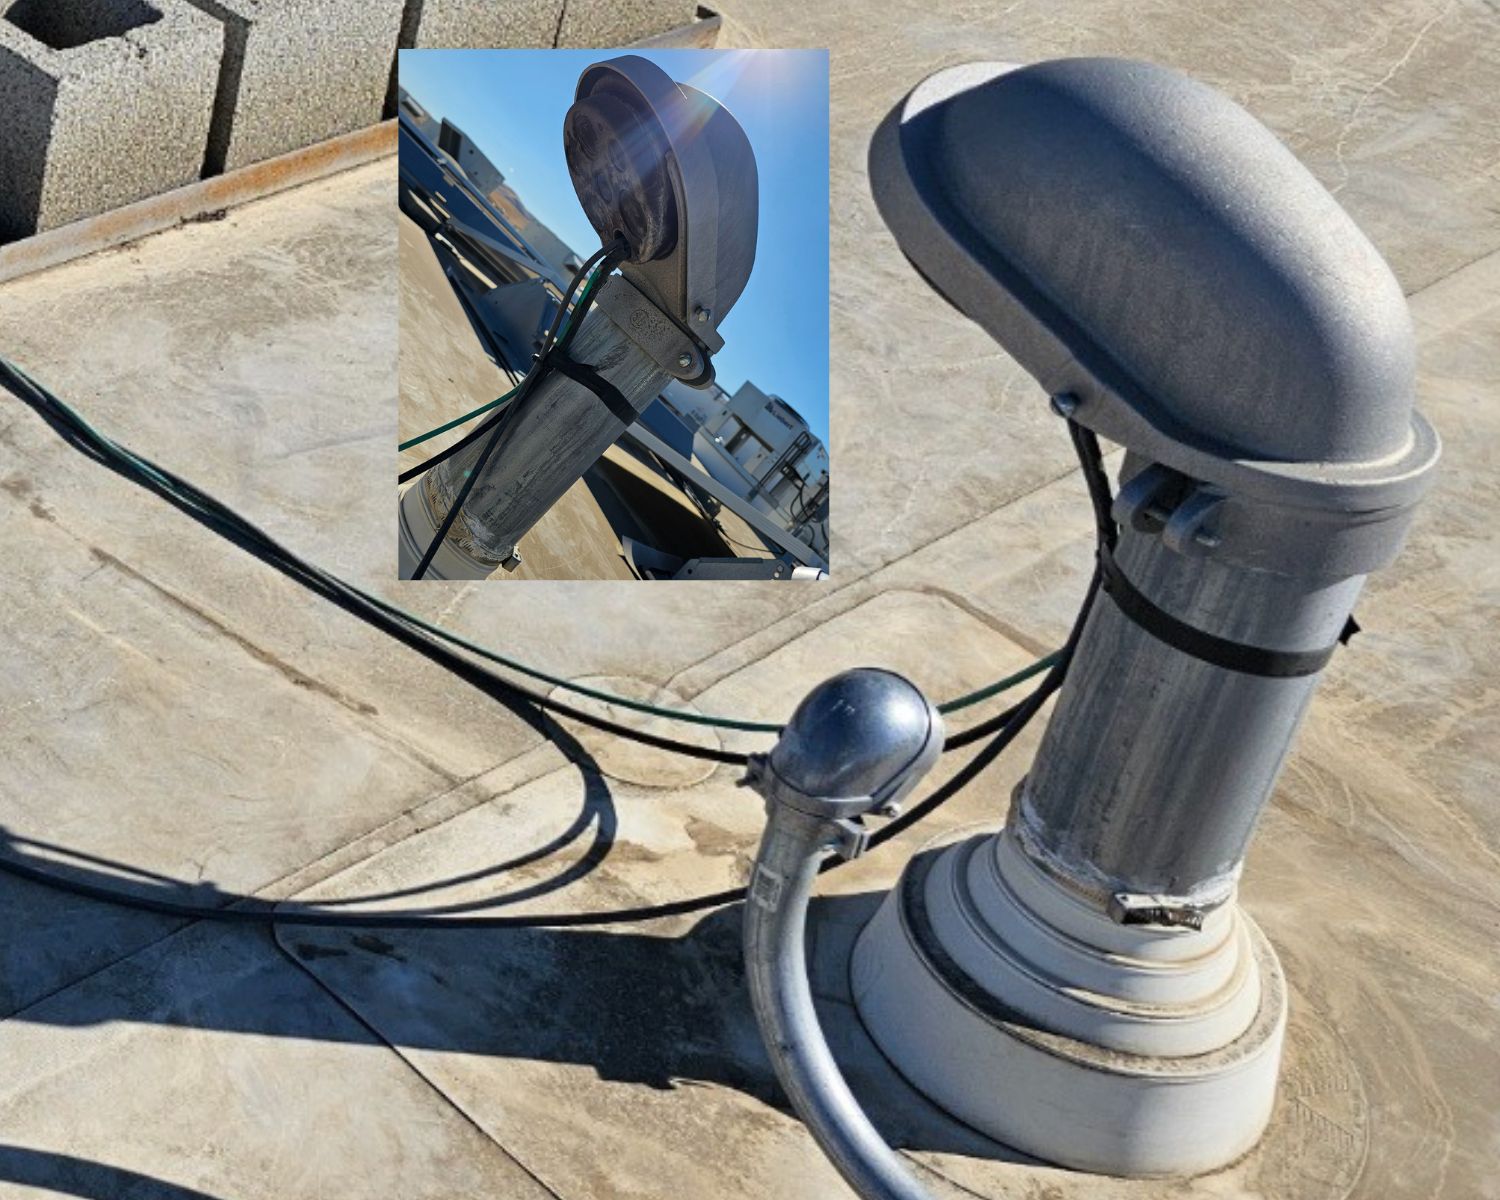
Starlink Dish Installation – The Starlink dish was securely mounted on the building’s roof using a non-penetrating roof mount stabilized with cinder blocks to prevent any movement or wind displacement. This setup ensures a stable and durable installation without the need to drill holes or cause damage to the roof surface.
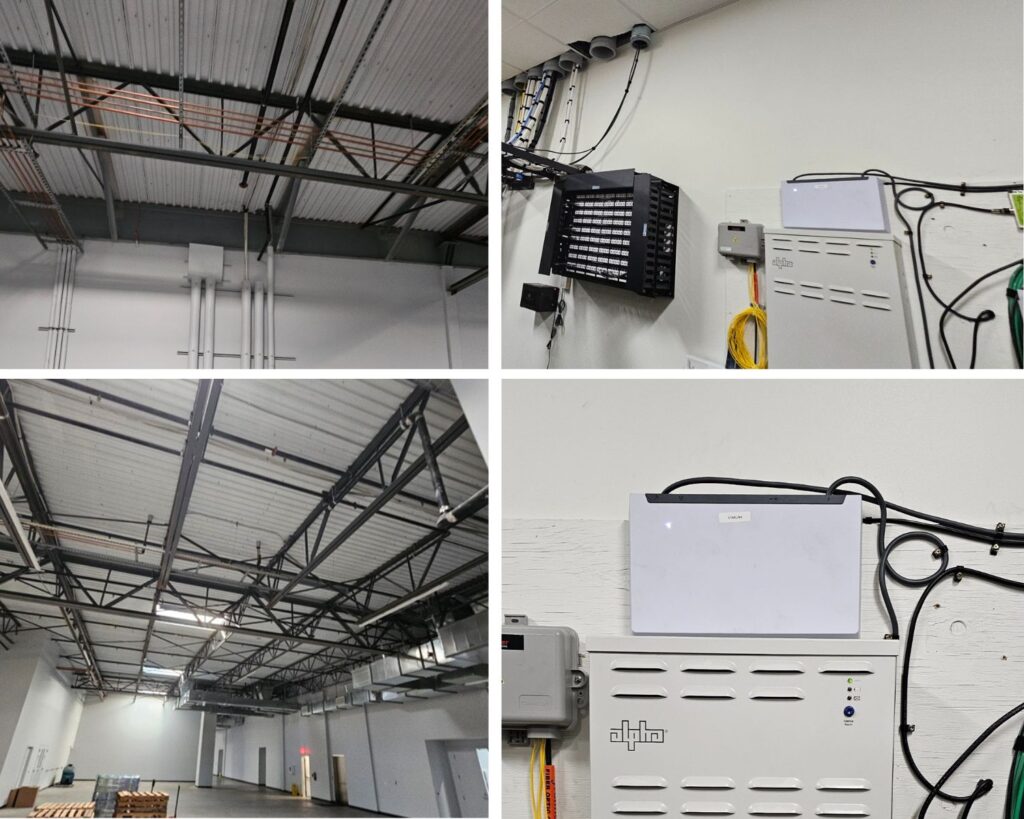
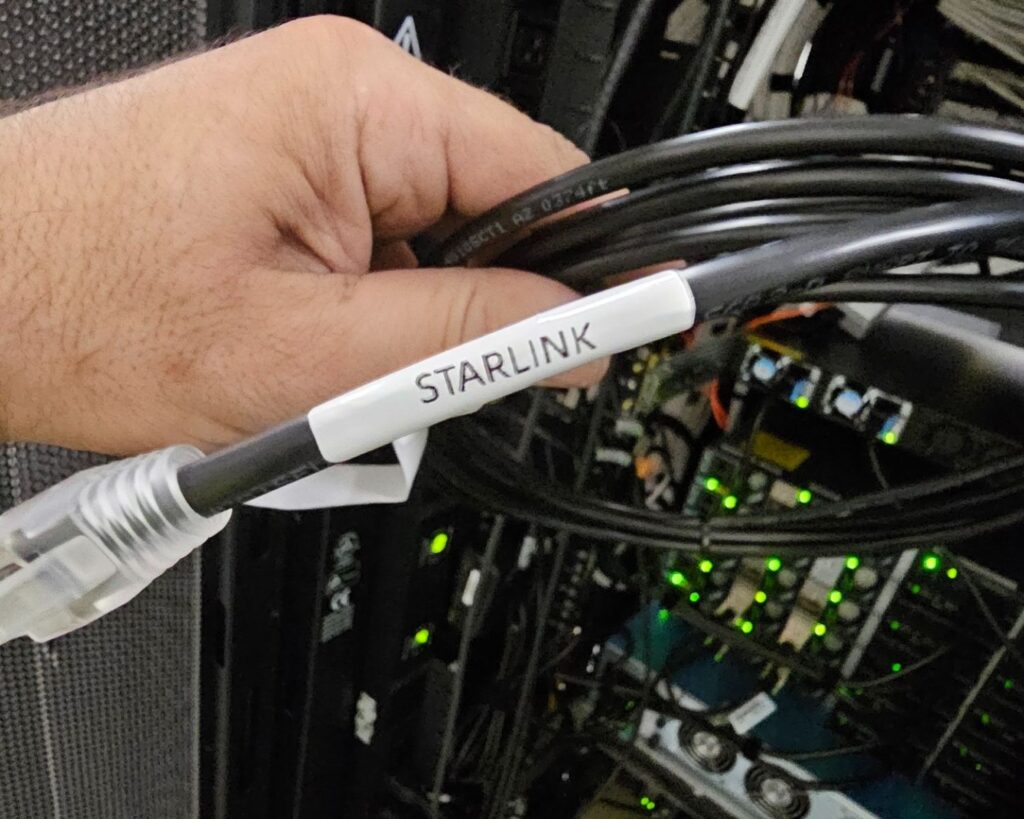
Starlink Cable Management – Routed the Starlink cable from the exterior dish into the building through a metallic conduit, providing a secure and weatherproof entry point. Inside, the cable is run along steel trusses and wall surfaces, neatly bundled with other structured wiring and supported by clamps for protection and organization. The cable continues directly to the MDF (Main Distribution Frame) location, where the advanced power supply and network equipment are mounted; all cables are clearly labeled and professionally managed for easy identification and maintenance.
Ethernet Cable – Terminate the Starlink using Ethernet cable connection to the port 2 of the SD-WAN device as failover internet connection
Removal of Dish
Apply WD-40 (or equivalent) to the dish and mount bolts to address rust or corrosion and facilitate dismantling.
Disconnect all remaining cabling, wiring and hardware associated with the dish.
Cut the 8 ft Verizon dish into manageable sections using power tools for safe handling and removal.
Dismantle the dish from the roof down, safely lowering all sections to the ground.
Disassemble and remove the non-penetrating roof mount, including all cinder blocks, from the roof down.
Stage all removed hardware and materials in a designated area onsite for client-managed disposal.
Provide basic site cleanup, ensuring the work area is clear of debris.
Capture before-and-after photos for client documentation.
3. Starlink Optimization and Performance Testing
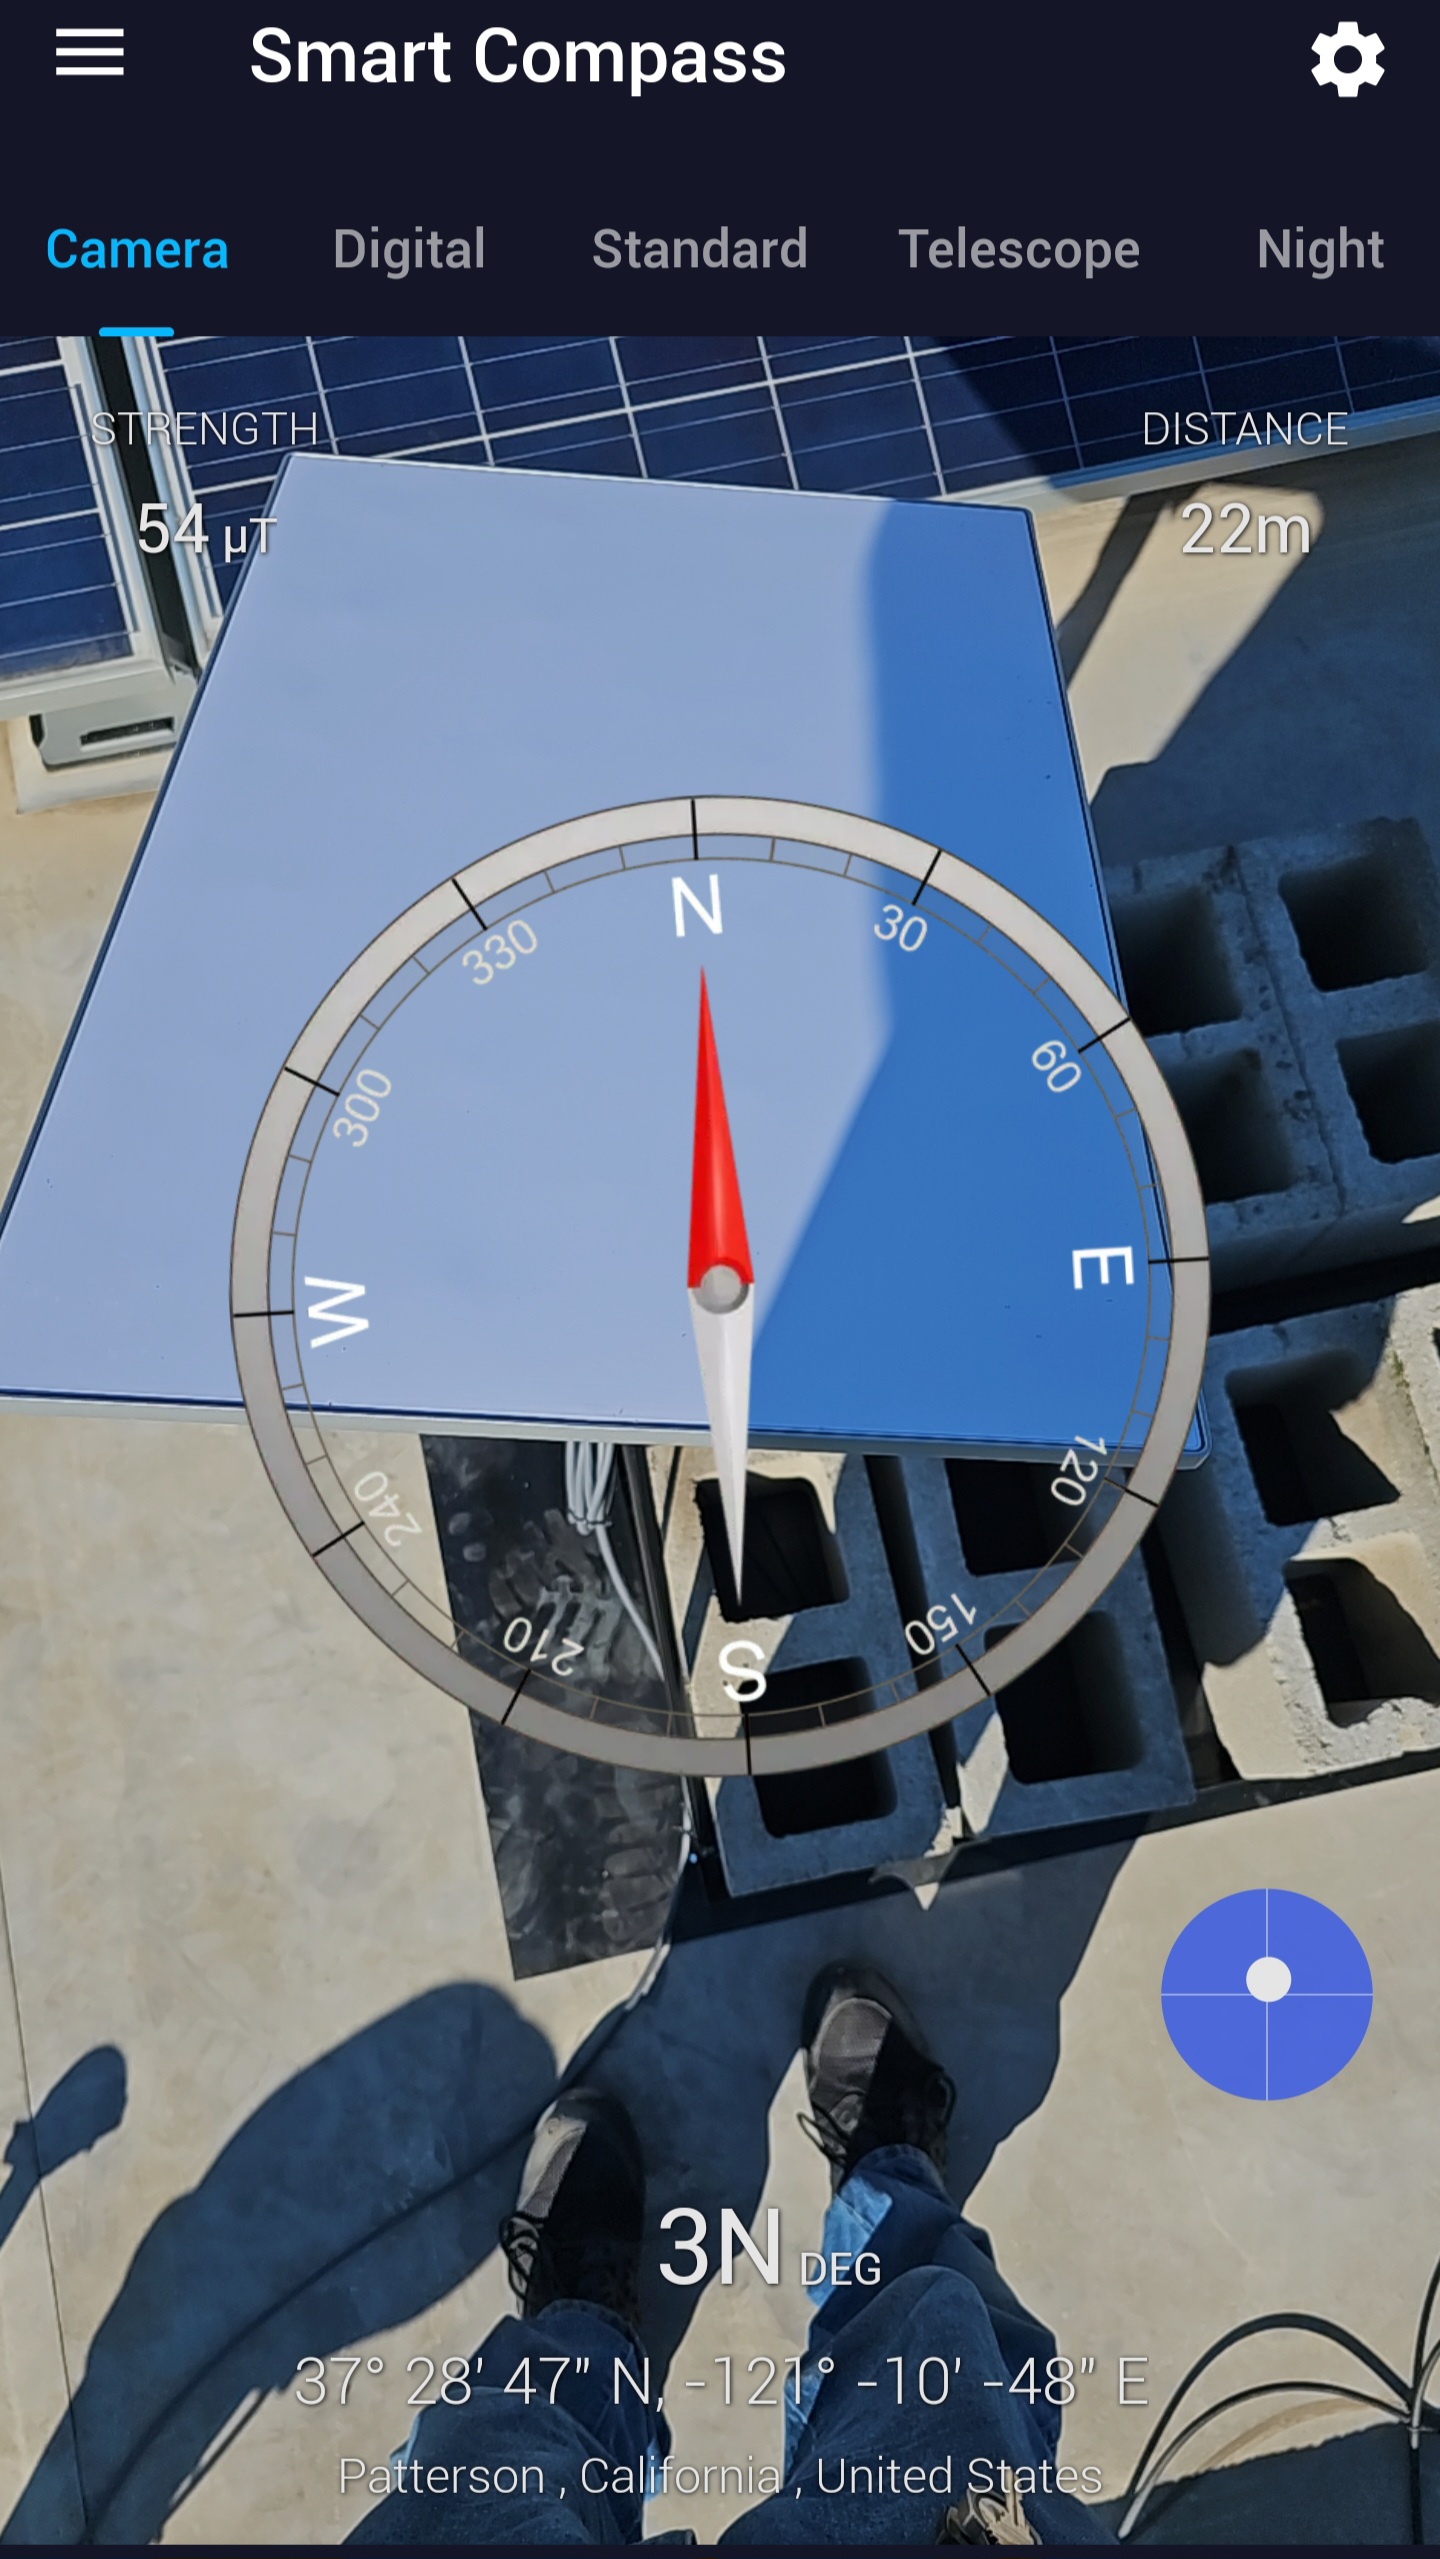
Following the Starlink dish installation, the team conducted a precise alignment test using a digital compass application to verify the dish’s orientation and ensure an unobstructed view of the northern sky. This alignment process confirmed that the dish was properly positioned for optimal satellite visibility and signal strength.
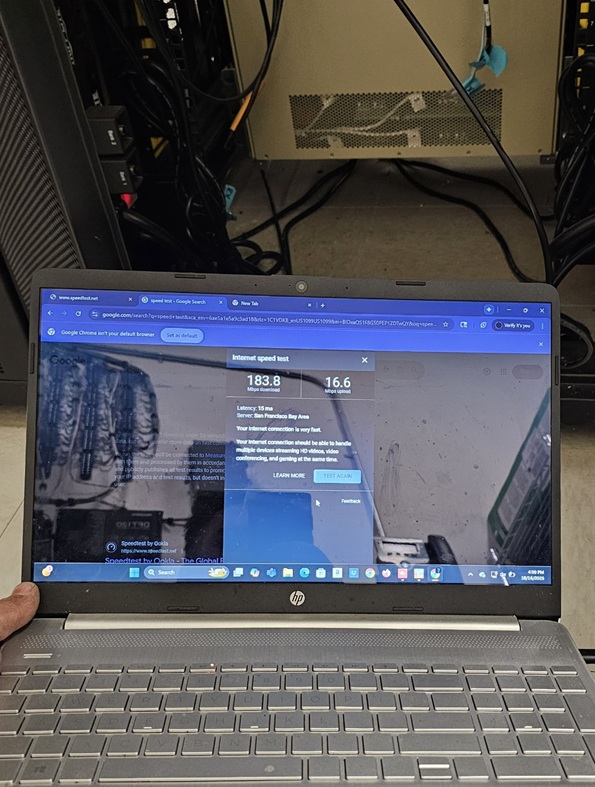
Next, the team carried out the Starlink speed test to verify the connectivity performance of the Starlink setup.
Starlink Speed Test Result: Download – 183.8 Mbps | Upload – 16.6 Mbps | Latency – 15 ms Reliable low-latency satellite internet performance, ideal for streaming, video calls, and remote operations.
NOTE: Starlink may require up to 12 hours to fully optimize its connection. During this initial period, temporary speed fluctuations or brief dropouts may occur. However, once the system stabilizes, it delivers a reliable and high-speed internet connection.
Transform your Business Connectivity with Professionally Installed Starlink by ProSat Networks
👉 Contact us at 1-844-799-0258 to request a quote.
DID YOU KNOW? Patterson, California known as the “Apricot Capital of the World,” sits in the heart of the Central Valley, surrounded by rich farmland and stunning mountain views. Its famous Apricot Fiesta, celebrated every summer since 1971, honors the city’s deep agricultural roots.